Friday, November 1, 2019

Patching old Exchange 2013 or Exchange 2016 servers

When patching Exchange 2013 or Exchange 2016 from an old Cumulative Update version, it is common to need to hop through multiple versions of Exchange Server.

For example, if your on Exchange CU11... to remain in a supported state you will need to patch as follows:
  • Upgrade Exchange 2013 from CU11 to CU15.
  • Upgrade the .NET Framework to 4.6.2
  • Upgrade from Exchange 2013 CU15 à CU20
  • Upgrade .NET Framework to 4.7.1
  • Upgrade from Exchange 2013 CU20 à CU22
  • Upgrade .NET Framework to 4.7.2
  • Upgrade from Exchange 2013 CU22 à CU23
See the support matrix here:

https://docs.microsoft.com/en-us/exchange/plan-and-deploy/supportability-matrix?view=exchserver-2019


The problem that most people on old patch levels find, is Microsoft has removed many of the older CU updates which makes moving from an old patch level a difficult task.

Luckily we have a legend that has posted all the Exchange updates here:


Very handy link to keep in your favorites.

Wednesday, September 25, 2019

Basic Authentication being Disabled in Exchange Online

On the 13th of October 2020, Microsoft announced they are turning of Basic Authentication across all protocols in Exchange Online apart from SMTP.  Basic Authentication will be turned of on all web services on 13th of October 2020 including POP and IMAP.  This was published here:

https://techcommunity.microsoft.com/t5/Exchange-Team-Blog/Improving-Security-Together/ba-p/805892

Microsoft are pushing people to use Modern Authentication (OAUTH2) which provides numerous advantages over basic authentication.  Basic Authentication is secure provided it is encrypted with TLS and has been used since Exchange 5.5 and is still heavily used now even in Exchange Sever 2019, however there are more secure ways which provide support for additional security such as Multi Factor Authentication (MFA).

I have issues with this announcement - many customers that have enterprise applications which connect to Exchange via basic authentication using POP or IMAP4 over TLS - and this is the only connectivity option these applications support.

Microsoft say in the announcement that they know this will cause potential disruption but they want to force companies to adopt the new authentication technology.  I have many customers with help desk ticketing systems, ERP solutions, document management, life-cycle management system etc that only support basic authentication.  Not to mention, as of 26/09/2019 Microsoft still doesn't even support Modern Authentication on POP or IMAP (commonly used for applications to connect) and say in their article "we are planning on adding OAuth Support to both POP and IMAP in next few months".  Great - gives application vendors lots of time to prepare!

The benefit of Exchange Server on-premises is you can control your own destiny and if you have applications you have invested 10 million+ into developing or rolling out, you wont expect that your cloud vendor will suddenly flick a switch and cause your application to stop functioning correctly.

If your using Basic Authentication in O365 - and I know many of you reading this article would be in some extent (most likely mobile phones) - make sure you address this, install the Outlook for Mobile application, upgrade your enterprise applications to ensure your ready for this significant change.

Monday, August 26, 2019

Preparing Exchange Topology - PrepareAD, PrepareSchema, PrepareDomain etc

I'm about to sit the Exchange Upgrade Exam (MS-202: Microsoft 365 Messaging Administrator Certification Transition) on Friday and currently doing a last minute brush up.  Having done all the certifications in Exchange Server since MCSE: Messaging 2003 all the way through to the latest Exchange 2016 exam (70-345) I know the types of Questions Microsoft has asked in the past.

One area tested that I recall from all previous exams was the process for preparing schema and domain...

Whilst the latest Exchange 2019 Exams are definitely going to be heavily focused on Exchange Online in Office 365 given this is Microsoft's primary drive, they also test on all the on-premises content.  I wouldn't be surprised if topology preparation is tested once again... even though in my professional opinion it is not an item of significant importance given that over 99% of businesses simply rely on the Cumulative Update wizard to automatically extend the schema and prepare the domains.

In Exchange 2003 we had the setup.exe /forestprep and setup.exe /domainprep.

From Exchange 2007 all the way to Exchange 2019 we have a number of commands now including:
  • Setup /PrepareAD
  • Setup /PrepareSchema
  • Setup /PrepareDomain
  • Setup PrepareAllDomains
I remember there use to be a fantastic article on TechNet which gave a breakdown of exactly what each of these commands did - however after spending a good 5 minutes on Google i came up short trying to find the article and not sure if it is still published.

I could find no "clear" breakdown of each of these commands and the descriptions given on the installer help is useless as shown below:


I did come across the book however Exchange Server 2010 Administration: Real World Skills for MCITP Certification and Beyond (Exams 70-662 and 70-663) published by Joel Stidley and Erik Gustafson that touched on these commands in more detail.

Given the lack of content covering these commands, I decided to do a quick blog post.

Setup /PrepareSchema

This command does one thing, prepares the schema (additional class objects and attributes required for Exchange Server).  It must be run in the same Active Directory site as the Schema master.

To run this command you must be a Schema Admin.

Setup /PrepareDomain

This command must be run in each domain within an Active Directory forest.  This command simply creates special domain accounts and security groups in each domain for hosting Exchange Servers.  Thing of it as creating some additional "Active Directory" objects, no schema extensions within the "Domain Partition" only.

To run this command you must be an Enterprise Admin.

Setup /PrepareAD

The PrepareAD command performs three things:
  • Prepares the Schema if not done already (same as PrepareSchema)
  • Prepares the Domain (for the forest root domain only in a multi-domain forest)
  • Creates the Global Exchange Objects in the Configuration Partition.
It is important to note, PrepareAD runs the PrepareSchema command for the forest and PrepareDomain for the forest root domain only (if not done already).

For a single forest, single domain environment - PrepareAD is the only command you need to run.

If you have multiple child domains or new tree domains in the same Forest, after you run /PrepareAD in the forest root domain, you will need to /PrepareDomain for each of the additional domains within the forest.

To run this command you must be an Enterprise Admin and a Schema Admin.

Setup /PrepareAllDomain

If you have multiple domains in an Active Directory forest and you wish to run /PrepareDomain across all domains at the same time, this is what the /PrepareAllDomains command is for.

Hopefully this post has been useful.

Exchange RBAC Example - Provide User access to manage Contacts

In June 2010, I wrote an article explaining how Exchange Role Based Access Control (RBAC) works - a new feature released with Exchange 2010.  RBAC is still heavily utilised today with Exchange 2019 and Office 365 following these principals.

My article from 2010 can be found here:

https://clintboessen.blogspot.com/2010/06/exchange-2010-role-based-access-control.html

After having not worked with RBAC for while, I found myself re-reading the principals of RBAC and re-running through what is involved to configure the security model.  Knowing this well is also essential and I'm doing my Exchange upgrade exam this Friday (MS-202 Microsoft 365 Messaging Administrator Certification Transition) so a refresher on these principals is always handy!

I had a requirement given to me by a customer which I need to spin up in my test lab, and I thought whilst I lab the requirement it might be a good idea to write a quick blog post on the process of implementing the RBAC changes.

RBAC Requirement

"A user in the business must be able to create mail enabled contacts for external workers.  This user must only be able to create mail enabled contacts and no other objects, and the contacts must be stored under a specific organisational unit only".

RBAC Security Model

With the design of RBAC, The Exchange Product Team referred to RBAC as the Triangle of Power.  This is elaborated in this blog post here:

https://techcommunity.microsoft.com/t5/Exchange-Team-Blog/RBAC-and-the-Triangle-of-Power/ba-p/597147

The security model has three arms:
  • Step 1: Where - Where are the objects stored that we want to change or what attributes or identifying factors must the object have?  They can be in a security group, organisational unit, anyone with a job title set to XYZ... the possibilities are endless.  My requirement for "Where" is contacts must be contained only under a particular organisational unit.
  • Step 2: What - What is what you want to do.  What Exchange PowerShell cmdlets do you want to give the administrator access to be able to run?  Think of "What" as the access rights you wish to delegate.  The commands we are interested in for my example are New-MailContact and Remove-MailContact.
  • Step 3: Who refers to who is able to perform the operation.  Which user do you want to delegate control to in order to run the commands under the What section.
This all glued together by a concept known as Management Role Assignments.


I will break this down using my three headers listed above.

Step 1: Where

In my lab environment we only want contact objects to be changed under the OU "Contacts".

avantlab.local/Contacts

As a result we are going to create a new "Management Scope".  By default all RBAC Management Roles have access to the entire Active Directory forest and no Management Scopes exist. 

I'm locking it down to the Organisational Unit based on a RecipientRestrictionFilter with the following query:

New-ManagementScope "AvantLab Contacts" -RecipientRestrictionFilter {DistinguishedName -Like '*,OU=Contacts,DC=Avantlab,DC=Local"}


Step 2: What

Now we are interested in assigning "What" cmdlets we want the admin to be able to run.  The "What" refers to two cmdlets:
  • New-MailContact
  • Remove-MailContact
Cmdlets are linked as "ManagementRoleEntries" to objects known as "ManagementRoles".

There are a few rules you need to understand when creating new Management Roles for the "what section":
  • It is not possible to simply create a new Management Role and add the cmdlets you wish to run under the role as Management Role Entries.  All custom (non default) Management Roles must be linked to a parent Management Role.  Parent Management Roles are ones that come by default with Microsoft Exchange Server "out of the box".  Think of it as your "cloning" the parent Management Role to create your "Custom" management role.
  • It is not possible to add additional cmdlets that were not in the parent - you can however remove cmdlets.
Base on these two rules, when your creating a new Management role your essentially taking a management role similar to what your trying to create "with too much access", and removing the additional access from the role.

So the first step I need to do is find an existing Management Role that contains the two cmdlets I'm interested in.  I did this by running the following cmdlets:

Get-ManagementRole -Cmdlet New-MailContact
Get-ManagementRole -Cmdlet Remove-MailContact


A Management Role that contains both these cmdlets is "Mail Recipient Creation" - so this is the Management Role we will use as the template for creating my new Management Role.

I'm calling my new Management Role "Contact Management" and I'm basing it on "Mail Recipient Creation".  As a result, the new Management Role was created with the following cmdlet:

New-ManagementRole -Name "Contact Management" -Parent "Mail Recipient Creation"


Now the default "Mail Recipient Creation" Management Role had more cmdlets then we want the delegated access users to have access to.  To list all the cmdlets that this Management Role can run, execute the following command:

Get-ManagementRoleEntry "Contact Management\*"


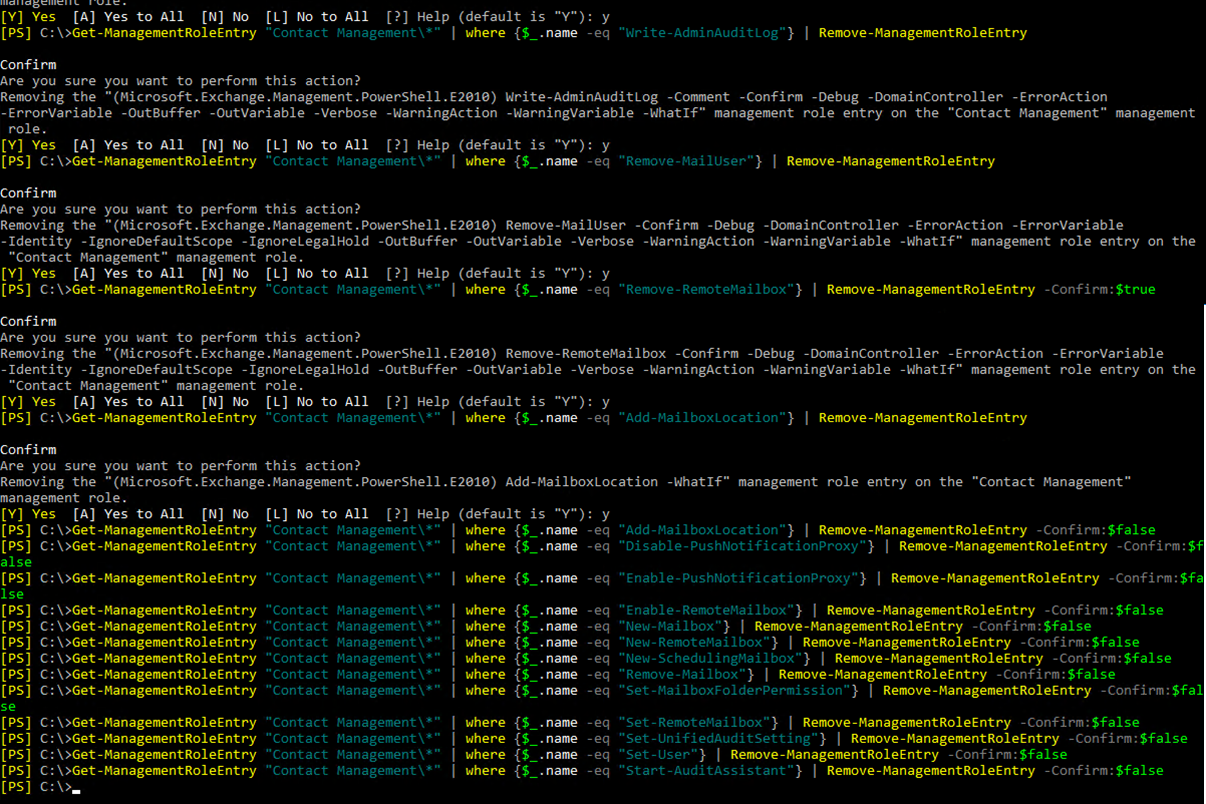
We want to remove all cmdlets not related to our Contact Management.  Most importantly we want to remove any cmdlets with "New-, Set-, Start-, Remove-, Disable-, Write-, or Remote-" as they have elevated access.  "Get-" cmdlets you cant make changes, you can only view data.

To remove the unwanted cmdlets from the Contact Management Management Role the following cmdlet was used:

Get-ManagementRoleEntry "Contact Management\*" | where {$_.name -eq "New-MailUser"} | Remove-MagementRoleEntry


And a few Get- commands I wanted removed:


This left the Contact Management role with the following cmdlets associated:

Get-ManagementRoleEntry "Contact Management\*"

This left Management Role access to run the following cmdlets.  The "Get-" commands present cannot make any changes or expose any information that I would not want the delegated user to see.  As a result I didn't clean these up but you can if you want.  Most importantly, the New-MailContact and Remove-MailContact cmdlets were left present.


Step 3: Who

The last step is the "delegation of control", which staff members will have access to be able to run the Cmdlets in the Management Role "Contact Management".

To determine the "Who" I created a new Role Group called "Contact Management Admins" defining the "Contact Management" Management Role and the "AvantLab Contacts" Management Scope.  This was done with the following command:

New-RoleGroup "Contact Management Admins" -Role "Contact Management" -CustomRecipientWriteScope "AvantLab Contacts"


This creates a new Group under Microsoft Exchange Security Groups in Active Directory for the new Role Group.


Testing the RBAC Security

I went and added a user called DelegationUser to the Contact Management Admins group.


Logging into Exchange Control Panel (now known as Exchange Admin Centre (EAC) in later revisions of the product), the webpage only renders the areas of EAC the user has access to.  RBAC and being "Cloud Friendly" are the two primary reasons the old Exchange Management Console from Exchange 2007/2010 was retired.


The user can successfully run the New-MailContact command via the webpage and place a Contact object under the Contacts OU - the Step 1: Where? section.


This is shown in the following screenshot:


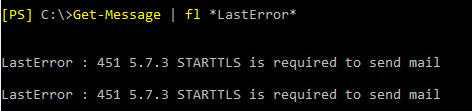
However if I try and create a contact in the default Users container, I get the message:

'avantlab.local/Users/DefaultUser Container' isn't within your current write scopes.  Can't perform safe operation.


This is because Step 1 "Where"... the management scope is restricted to only the Contacts OU.  Obviously Management Scopes are ridiculously granular and you can go far beyond restrictions of something as basic as an OU.


 What about the Glue?

Stop sniffing the glue Clint, I thought there was Glue in between holding these objects together as shown in the diagram below.

When I created the Role Group I also specified the Management Role and Management Scope.  This automatically created a ManagementRoleAssignment called "Contact Management-Contact Management Admins" as shown in the screenshot below.

Creating ManagementRoleAssignments manually useful especially when you want to create associations between existing objects that already exist on the system.


If we look at the Management Role Assignment "i.e. the glue" closer, we can see that it has all three components created above are "glued" together.
  • The Management Scope... Step 1: Where (CustomRecipientWriteScope: AvantLab Contacts)
  • The Management Role... Step 2: What (Role: Contact Management)
  • The Role Group... Step 3: Who (RoleAssigneeName: Contact Management Admins)


Hopefully this step by step guide to using Role Based Access Control was useful and can be put to use within your environment!

Sunday, June 16, 2019

Unable to remove RDS Session Host

A customer had a failed RDS Session Host which needed to be removed from a cluster.  We were not able to login to the failed host as it was blue screening and needed to be forcefully removed.

Even using PowerShell with the -force switch we were unable to remove the server getting the following error:

"Unable to cleanup the RD Session Host server"


To remove the server we needed to install SQL Management Studio and connect to the RD Broker Windows Internal Database (WID) which is a lightweight install of MS SQL.

SQL Management Studio was downloaded and installed from the following link:


https://go.microsoft.com/fwlink/?linkid=2094583

Make sure you run SQL Management Studio as "Administrator" and you should be able to connect to the following instance as a Domain Admin:

\\.\pipe\MICROSOFT##WID\tsql\query


The server needs to be removed from two tables:
  • rds.Server
  • rds.RoleRdsh
Make note of what ID number the server you want to remove is... mine is ID 4 as shown in the screenshots below.


Next I used the following command to remove the failed server from the RD Broker database:


use RDCms;
delete from rds.RoleRdsh where ServerID = '4';
use RDCms;
delete from rds.Server where Id = '4';


I strongly recommend a full backup of the SQL database be taken before making any changes.

Hope this post was helpful.

Tuesday, May 21, 2019

Azure AD Seamless SSO - Prompts on Connecting to aadg.windows.net.nsatc.net

At a customer site when attempting to access the https://myapps.microsoft.com/companydomain.com portal to test Single Sign-on with Azure AD, we were constantly being prompted "Connecting to aadg.windows.net.nsatc.net".

 
We had gone through significant troubleshooting on the issue but could not find a resolution online.  This troubleshooting included but was not limited to:
  • Confirmed that we have received the Kerberos ticket from the AZUREADSSOACC with “klist get AZUREADSSOACC”
  • Added https://autologon.microsoftazuread-sso.com and https://aadg.windows.net.nsatc.net to the Trusted Sites
  • Confirmed the servicePrincipalNames on the AZUREADSSOACC are correct
  • Validated the Single sign-on is enabled on the Azure AD Portal and in the Azure AD Connect tool
Troubleshooting sites we went through included:

https://docs.microsoft.com/en-us/azure/active-directory/hybrid/tshoot-connect-sso

After speaking with Microsoft, they mentioned that "https://autologon.microsoftazuread-sso.com" must also be in the "Local Intranet" zone.
 
  
This is due to the default security setting "Automatic logon only in Intranet zone".  If this was set to "Automatic logon with current user name and password" this would have also fixed the issue but is not as secure.
 
 
After making this change Single Sign-On works.

Wednesday, May 15, 2019

Office 365 Tab not working in Exchange Admin Center

After running the Hybrid Configuration Wizard, the Office 365 tab doesn't work by default which catches out many people.  The tab is found at the top of Exchange Admin Centre where it says "Enterprise" and "Office 365".


When you click Office 365 it directs to "Get the most from Office with Office 365" webpage asking you to purchase the product.


After running the Hybrid Configuration Wizard, you must schedule an outage and perform an IISReset on your Exchange 2016 CAS Servers.  After doing an iisreset you will find that the Office 365 tab works as expected.

Wednesday, May 8, 2019

Exchange 2010 and Exchange 2016 co-existance Free/Busy Issues

I have a lab environment containing Office 365, Exchange 2016 and Exchange 2010.  Free busy is not working from O365 --> 2010 or Exchange 2016 --> 2010.

The Autodiscover record points all EWS requests to Exchange 2016 Web Services Virtual Directory for the Availability Service.

The Availability Service on the Exchange 2016 server is failing to lookup requests on Exchange 2010 mailboxes.

It is also important to note, the 2016 server is the one setup in Hybrid with O365, so it is responsible for looking up all Availability requests on-premises.

After doing some research into the issue, I identified that the InternalNLBBypass URL on the Exchange 2010 server must point and resolve directly to the Exchange 2010 server.  It must not be set to $null or point to the Availability Service on Exchange 2016 (in my lab that being mail.avantlab.com.au).

Exchange 2016 Web Services Virtual Directory:


Exchange 2010 Virtual Directory:


As soon as setting the InternalNLBBypassURL to point directly at Exchange 2010, this resolved the issue.

See my lab all working:

  • Arya is in Office 365
  • Jon is on Exchange 2010
  • Bran is on Exchange 2016
And yes, they are all Game of Thrones characters :)


I blogged this one as I could not find much information online regarding this!

Sunday, April 28, 2019

Cisco Router messed up SMTP TLS with Office 365

Mail routing from Office 365 to an on-premise Exchange Server was working successfully.

Mail flow from the on-premises Exchange Server to Office 365 was failing.

Email in the queue was generating:

LastError : 451 5.7.3 STARTTLS is required to send mail


I had a valid SMTP certificate bound to with Enable-ExchangeCertificate and my Send Connector to Office 365 was TLS enabled - yet we had a TLS error.

This was caused by a Cisco Router 1941 with SMTP inspect causing issues.

The router has the following line in the config:

"ip inspect name CBAC smtp"


After removing this line with "no ip inspect name CBAC smtp" mail flow started working successfully.