Showing posts with label Virtualization. Show all posts

Sunday, December 27, 2015

The Dirty Little Secret about P2V Migration with System Center Virtual Machine Manager

Physical to Virtual Migration has been around for a long time ever since companies started making the transition to Virtualisation as a standard back in 2008 with the release of VMware ESX 3.x quickly followed by 4.x and vSphere.

There a many tools on the market for Physical to Virtual migration of machines with the most common being "VMware vCenter Converter: P2V Virtual Machine Converter", "Microsoft Virtual Machine Converter 3.0" and the handy little tool from sysinternals "Disk2vhd".

In the brand new shiny System Center Virtual Machine Manager (VMM) 2012 R2, this tool also supports Physical to Virtual migration of workstations as an easy transition to a virtual platform for physical servers.

However if you look at the fine print in the "prerequisites" you will see:

"Cannot have any volumes larger than 2040 GB"

https://technet.microsoft.com/en-au/library/hh427293.aspx

What the @$%@!!!

Very disappointing seeming this is the latest release of VMM and this limitation is still around... this would trip up many companies who are still looking to virtualise that legacy file server or mail server sitting around on their network!

Tuesday, January 20, 2015

HyperV Network Types

Microsoft HyperV servers have three Network Types you can assign to Virtual Machines and Virtual Switches.
  • Private
  • Internal
  • External
This is shown below on both a virtual machine and a virtual switch configuration.


What is the difference between these?
 
An External Network Type provides communication between a virtual machine and a physical network by creating an association with a physical network adapter on the virtualization server.  This is the most common type used by organisations.
 
An Internal Network provides communication between the virtualization server and the virtual machines.
 
A Private Network only provides communication between the virtual machines and not the HyperV host server.
 
Internal and Private network types can be confusing - the only difference is Internal also allows the virtual machines to communicate with the HyperV host server.

Tuesday, February 25, 2014

VMware to HyperV Migration

Microsoft has released a small but powerful tool for converting VMware Virtual Machines to HyperV virtual machines called Microsoft Virtual Machine Converter (MVMC).  This tool is able to convert the entire virtual machine including virtual disk and configuration files to HyperV format ready to use on a Windows Server 2012 hypervisor.

Microsoft Virtual Machine Converter comes part of the Microsoft Virtual Machine Converter Solution Accelerator package which can be downloaded from the following URL:

http://www.microsoft.com/en-us/download/details.aspx?id=34591

Before installing the product, you must ensure your system is running .NET Framework version 4.5 which is required by the application.

There tool is available in two form factors:
  • Microsoft Virtual Machine Converter Solution Accelerator
  • Microsoft Virtual Machine Converter Plug-in for VMware vSphere Client
Both of these factors can be downloaded from the above Microsoft TechNet page.

The Microsoft Virtual Machine Converter Plug-in for VMware vSphere client allows you to convert the virtual machines straight the vSphere client by simply right clicking the virtual machine and selecting "Convert to Hyper-V virtual machine"

 
It is important to note that as of this writing only the following VMware platforms are supported for this method of migration.
  • vCenter Server 5.0
  • vCenter Server 4.1
  • VMware ESXi Server 5.0
  • VMware ESXi/ESX Server 4.1
My environment is running VMware ESXi Server 5.5 and as a result this is not supported so the following error was received:

Microsoft Virtual Machine Converter is not compatible with this version of vCenter/ESX/ESXi server.
 
 
 If I was using an older version of ESX, you would see a wizard as shown on the following blog post:

http://www.ivobeerens.nl/2012/07/30/convert-vmware-to-hyper-v-vms-with-microsoft-virtual-machine-converter/

You can however convert VMware 5.5 vmdk files to VHD using the command line utility.

Simply use the following symtax:

MVDC.exe "vmdk source path" "target"

For example in the following screenshot I have converted a Windows 8 vmdk file to a VHD file.


It is also possible to convert VMware Virtual Machine configuration files to HyperV configuration files using the MVMC.exe command line utility.

For more information on this tool please see the official Microsoft TechNet article available from:

http://technet.microsoft.com/en-us/library/hh967435

Monday, October 28, 2013

The security certificate presented by this website is not secure - IE10

I had a problem with Internet Explorer 10 when going to a untrusted site in my case, my local vCenter server to download vSphere, I got an error "The security certificate presented by this website is not secure".  Usually you are able to click "Continue to this website (not recommended)" however in Internet Explorer 10 this option was no longer available.


After some research I came across Microsoft KB2661254 which mentions this is due to the minimum key length of the certificate being less then 1024 which in this case it will be blocked.  This Microsoft KB article can be found on the following site:

http://support.microsoft.com/kb/2661254

After reviewing the default VMware certificate generated on the vSphere server, I verified that the certificate key length was only 512 as shown in the following screenshot.


As a result following the advice from Microsoft on KB2661254 I lowered the required certificate key length to 512 using the following command from an administrative command prompt:

certutil -setreg chain\minRSAPubKeyBitLength 512


After making this change, I was able to continue past the certificate warning as normal and download my vSphere client.

Monday, July 15, 2013

WdsClient: There was a problem initializing WDS Mode

Tonight I wanted to deploy a bunch of Windows Servers from a customised WIM file for my home lab environment running on VMware Workstation - need to test something for a customer tomorrow :).  In minutes I had built a new WDS server with DHCP and PXE boot services, however when I went to boot my first VMware machine from my WDS server, the PXE boot went through fine however I ran into the following error.

WdsClient: There was a problem initializing WDS Mode


After a good 10 minutes trying to figure out what was going on I ran services.msc on my host physical Laptop.  The darn VMware DHCP Service was running!


The virtual machine was booting of the WDS DHCP Server after booting it went to obtain a second IP address which was the VMware DHCP Service!  Ahg!

Sunday, August 5, 2012

Rename VMDK files in ESX

vSphere Client v4-v5 does not allow you to rename a VMDK file through datastore manager.  To rename a VMDK you must do this through management shell (SSH).

To enable the Shell through the GUI refer to the following screenshot:


Once in the shell, login through an SSH client such as Putty.

Navigate to the location in your VMware datastore in which you wish to rename the VMDK using the following command:
cd "/vmfs/volumes/Datastore Name/Directory Name/"

Use the following command to rename the virtual machine:
vmkfstools -E examplevm.vmdk examplevm-renamed.vmdk

Sunday, July 8, 2012

How to enable SSH to an ESXi 5 Host

To enable the ESXi Shell from the Direct Console

1
Access the direct console of the ESXi host, press F2, and provide credentials when prompted.

2
Scroll to Troubleshooting Options, and press Enter.

3
Select Enable ESXi Shell and press Enter.

On the left, Enable ESXi Shell changes to Disable ESXi Shell. On the right, ESXi Shell is Disabled changes to ESXi Shell is Enabled.

4
(Optional) Configure the time-out for the ESXi Shell

a
Select Modify ESXi Shell timeout and press Enter.

b
Enter the time-out value in minutes and press Enter.

5
Press Esc until you return to the main direct console screen.

You can enable the ESXi Shell from the vSphere Client.

To enable the local or remote ESXi Shell from the vSphere Client

1
Select the host, click the Configuration tab, and click Security Profile in the Software panel.

2
In the Services section, click Properties.

3
Select ESXi Shell and click Options.

4
Change the ESXi Shell options.

To temporarily start or stop the service, click the Start or Stop button.

To enable access permanently, click Start and stop with host. The change will take effect the next time you reboot the host.

5
Click OK.

6
(Optional) Configure the time-out for the ESXi Shell from the vSphere Client.

a
In the Configuration tab’s Software panel, click Advanced Settings.

b
In the left panel, click UserVars.

c
Locate UserVars.ESXiShellTimeOut and enter the timeout value in minutes.

d
Click OK.

After you have enabled the ESXi Shell, you can use it from that monitor or through an out-of-band network connection.

Wednesday, March 28, 2012

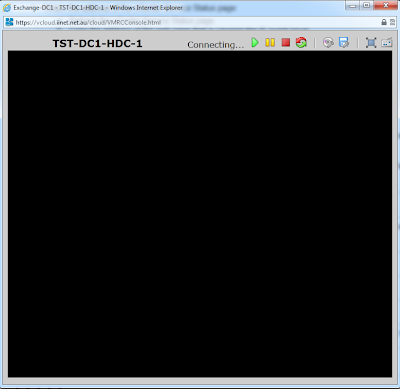
Blank Screen in VMware vCloud

I kept getting a black screen when trying to console a virutal machine in a vCloud environment. It would just hang saying Connecting...


To fix it I simply added the vcloud HTTPS address as a trusted site in Internet Options.